The best way to Plant Potatoes Hydroponically

The expression hydroponics now pertains to to any way of growing crops without soil once employed to explain the method of growing plants in water. Hydroponics provides you with the capability to develop vegetables, including potatoes, on a tiny condominium balcony or in a little lawn greenhouse. It enables one to grow them year round in the the heat of your house, provided that the plants are subjected to sunlight during your windows all the day. The approach is useful with potatoes although you will find many methods of gardening. This this method utilizes an inert materials like perlite or pebbles to to aid the root and plant system-while it is developing.

Purchase certified seed potatoes from garden shop or an area seed. These cut parts with a couple of eyes each or might be complete potatoes with eyes. Seed potatoes will carry diseases and are more effective than using potatoes you purchase in a grocery shop, which might happen to be treated to prevent sprouting.

Cut entire seed potatoes into pieces regarding the size of an egg, making sure both have at least two eyes.

Move your bin into a warm place that receives at least six hours of sunlight each day. Drain holes in the plastic bin utilizing a 1/2 inch bit. Create a row of holes on all the extended sides of 2″ over the base of the container and your bin.

Pour your perlite to the container, leaving 2″ of space that is open on top. Perlite is a kind of volcanic rock, generally marketed crushed. Its light-weight and dampness-wicking qualities make it perfect for hydroponics. Perlite can be found by you at most of the garden-supply retailers.

Until it commences draining from your holes pour water to the bin.

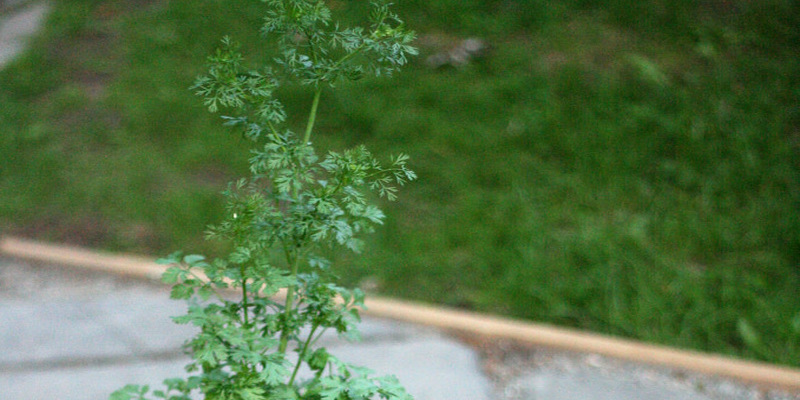
Plant the seed parts in the perlite, about 1-inch below the area. Place cut parts reduce-aspect down. Space the items four to to 6 inches aside. Cover sprouts peek-through the perlite, which requires about two months. Remove the protect to water the crops, which you ought to do about every three to four times.

Add fluid fertilizer a-T least once a week sprouts seem. Mix 1 teaspoon of 202020 fertilizer with micro-nutrients gallon of water. in a Until it start-S to dribble out the drain holes pour in the fertilizer answer just as you’d regular water.

See related

The best way to Grow Brunnera Macrophylla &#3 9; #3 9 & Variegata;

Brunnera macrophylla “Variegata” is generally called variegated heart-leaf brunnera. This flower grows from a rhizome that is fibrous. Mounds of felt-like, pale-green leaves appear each year. Variegata creates heartshaped leaves using a cream-color along the edges. The small blossoms cluster stems. Brunnera macrophylla “Variegata” is planted as reduced borders and floor covers in U.S. Department of Agriculture plant-hardiness zones 4 through 8.

Plant the Brunnera macrophylla “Variegata” in a cool, shaded area. An area with over four hours of sunlight isn’t appropriate for this particular plant. The plant wants the hotter the area to shade. This plant does -shade places like under trees and shrubs.

Mix compost and natural materials to the soil to produce a -rich soil. Good-draining soil is is recommended, but the plant grows nicely along backyard ponds. Plant the flowers using their crowns near-ground level.

Water the plants once a week. Pour the water round the bottom of the crops rather. Wet leaves which do not dry in the shade start the plant to attacks. The brunnera tolerates dry spells, but nevertheless, it’s going to go dormant and cease if subjected to prolonged drought problems, developing.

Cut back the leaves using a knife in the spring. Into a couple inches tall using a lawn-mower, mow the plant again for extremely large places of brunnera. Leaving the leaves through the winter on the crops safeguards the crown of the perennial. Protect the bed if developed in a area with spring-time frosts.

Divide the clumps of crops throughout the spring or fall to propagate the brunnera. Dig the big clumps using a shovel up and split up the person crops. Replant the flowers in the website and transfer other crops to your new location. These self-seed go on to into a new location and therefore carefully discover the little crops using a hand trowel.

See related

The best way to Cultivate Geranium Cuttings

Geraniums (Pelargonium x hortorum) are typical backyard and container crops which can be easily propagated through cuttings. Cuttings are usually used late summer or early fall, but they’re often used early winter or late fall. The cuttings are rooted and looked after throughout the cold temperatures and usually transplanted for their location in the spring. To effectively root a geranium, cultivate or prepare and treatment for the cutting utilizing rooting methods that are several typical to the majority of types of cuttings.

Pinch off the leaves on the bottom halves of a geranium cuttings along with thumb and your finger. Cuttings are usually about 4″ long, obtained from from healthy crops from wholesome stems. Remove the leaves in the bottom one to two inches of the stems in the event the cuttings are longer than this.

Roll where the leaves were eliminated in a powder or fluid hormone, or dip the conclusion of the cuttings. Rooting hormone aids cuttings take root rapidly, ensuring achievement. As indicated by the producer use. To avoid contamination of the container that is entire, place a tiny bit of of rooting hormone on a bit of paper or little cup and roll or use that to dip the cuttings.

Prepare a well-draining potting medium and fill plant pots that are little using the medium until it’s approximately 1/2 inch below the rim. Don’t pack down it. A a mixture of 1 part coarse sand mixed with 1 part peat moss, perlite or vermiculite is useful.

Place the pots in-tray of water that is shallow and enable the medium to moisten in the bottom up. Insert the conclusion of a pencil to the medium to create a hole in every pot for the cuttings. In a pot that is bigger, area the cuttings about three or four inches. This stops the hormone from rubbing the stems off throughout insertion. Insert the cuttings to the holes and tamp the medium across the cuttings. The medium should not be touched by any leaves.

Chopsticks or three pencils, two or other appropriate sticks across the cuttings. They need to be about one to two inches taller in relation to the cuttings. Place a clear-plastic bag loosely overtop of every planting pot. This aids keep humidity and the heat in, an atmosphere for cultivating geranium cuttings. Don’t seal the bags.

Place the pots in a vivid window with lots of in direct mild. Check the cuttings everyday and water as required to keep the medium moist. Should excessive dampness is noticed by you on the bag, go on it off and wipe some of it a way. Too much humidity can result in s Oil circumstances that are wet. After 30 days, gently tug to find out should any resistance is felt by you. In case you do, roots have been effectively shaped by the cuttings.

Wait one to two weeks for the roots to increase a-T least 1-inch. Then you’re able to take off the plastic bags, re-plant the cuttings — which are fully-formed crops, a little — into greater pots with normal planting medium and place them in a sunny region.

See related

The best way to Replace the Black Rubber Protect on a Garbage Disposal

Garbage disposals are handy additions to your kitchen as foods is ground by them when you rinse the plates, bowls and utensils. As useful as disposals are, they are able to give your sink a foul odor when they’re not covered. A garbage disposal’s rubber splash-guard, situated in the sink flange, stops food and water from splashing up when the disposal is in use. Protect, or the guard, might deteriorate as a result of normal wear and tear, and will be replaced.

Turn the power to the rubbish disposal off by flipping off its circuit-breaker in the circuit box whether it’s it is hard-wired or by unplugging it. Confirm the power is off by turning the toggle-switch of the disposal on and off several times.

Open the cupboard doors. Create a stack of telephone publications or wood blocks beneath the disposal after you loosen the fasteners to catch it.

Disconnect a pair or the drain pipe in the side of the disposal by by eliminating one flange bolt. Pull the pipe off yourself.

Locate the threaded fast-link ring close to the very top of the rubbish disposal. Rotate the ring in a counter-clockwise path yourself or by slipping the suggestion of a Phillips screw-driver in a tab; some disposals function steel or plastic fasteners which you need to eliminate before rotating the fast-link ring.

Pry the disposal down in the sink flange if it did not fall when the fast-link ring was loosened. The rubber splash-guard out yourself.

Compare the new and old rings to ensure they’re the same dimensions to avoid leaks. The alternative rubber that is slip splash-guard to the rubbish disposal.

Lift the disposal and rotate the fast-link ring in a clockwise path to secure it. Tighten the the machine by reversing the Phillip’s screwdriver for leverage or by hand.

Reconnect the drainpipe to along side it of the disposal. Run water through the sink to create sure there aren’t any leaks. Turn the power-on.

See related

The best way to Refurbish a Rusty Wood Stove

Heat is provided by wood stoves to an area as well as appeal for a lot of individuals. Buying a wood stove that is new isn’t an alternative for everybody, however there’s a solution. Refurbish an aged wood stove to increase the area. The procedure isn’t difficult, but it’s time consuming and needs plenty of elbow-grease. The least costly method to eliminate the rust is using steel wool and a wire brush. Sandblasted elimination of the rust is time consuming but more costly.

Rub a wire brush on the area that is rusted. Clean the area by blowing off it occasionally with the air nozzle to remove the particles. Continue rubbing the region together with the wire brush before the surface is extremely near to easy or easy. Rub the palm of your hand on the surface to test for bumps.

Rub steel-wool on the stove to produce an area that is sleek. The area that is clean occasionally using the air nozzle to eliminate particles. Rub the palm of your hand on the surface to test for bumps.

Remove the cement from the seams of the wood stove. Chisel and pry all free cement in the seams using a putty knife or chisel. The area that is clean occasionally using the air nozzle to eliminate particles. Check all seams in the woodstove that is specific you’re working on for cement that is aged. Each woodstove is diverse.

Apply stove cement to every seam. Wipe the seam down using a paper-towel then using a moist cloth. Distribute the stove cement in every seam using the straight-edge of the putty knife. Use a damp paper towel to remove extra stove cement in the surface of the woodstove. Cement is hard and very sticky to perform with. Try to fill crevice, crack or each seam as evenly as feasible. Allow the stove cement to dry 2 4 hrs before continuing.

Wipe the complete woodstove down having a paper-towel then a lint-free fabric to eliminate any dirt or particles.

A coat of stove polish within the whole woodstove having a moist lint-free fabric. When implementing the polish use a movement. Easy entry is provided by the movement to applying stove polish in most ridges and style are as. Allow the woodstove polish to dry for 24 hrs. Check the area and look for protection that is sufficient. Apply an additional coat if required.

Buff the stove polish that is dried having a gentle lint-free fabric. When buffing use a round movement.

See related