Overhauled Interiors at a Tiny Fisherman's Cottage

Even though it’s a part of Irish history, this 280-square-foot cabin was rotting away in Ireland’s coastal town of Bray. Constructed in the 1880s as a crude fisherman’s cabin, it was decaying and uninhabited because a poor remodel in the 1960s. The client, who grew up in Bray, pictured bringing the cabin into life as a little vacation home.

Colm Doyle and DMVF Architects helped her turn this very small space into something livable and bright. Behind its traditional cabin exterior, a new, modern interior revolves around an innovative plywood cube that divides the space by action, creating a slick and open feel.

at a Glance
Who lives here: This is another home for a Dublin girl to keep in while visiting with her mother.
Location: Bray, Ireland
Size: 280 square feet

DMVF Architects

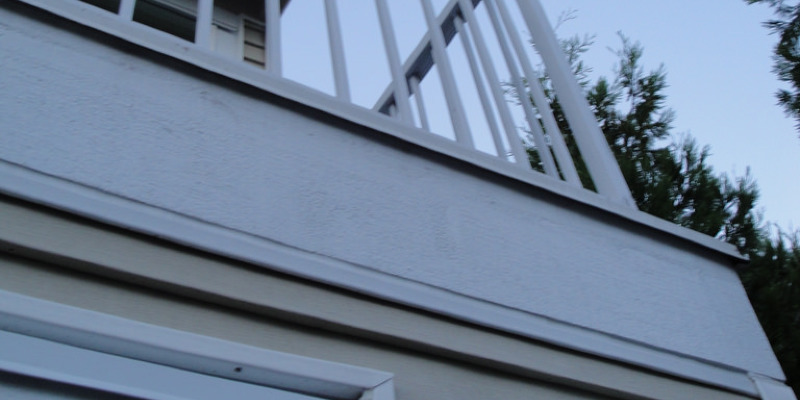
The client wanted to maintain the cottage look of the exterior. Owing to its history, this home is listed as a protected structure, which intended Doyle couldn’t knock it down and needed to operate inside its tiny footprint. But since the house was remodeled in the 1960s, the interior could be changed dramatically.

The cabin doesn’t have any front or back garden, and originally had only one tiny toilet that needed to be accessed from the outdoors.

DMVF Architects

Traditional forms fall away indoors, as you can see in those pictures of the redesign, taken before the home has been decorated and furnished.

The first layout had divided the house with a galley kitchen down the middle — right in the entrance — with all the bedroom on one side and a little living area on the opposite. The strange layout made the 280 square feet feel even smaller. The client wanted to make the most of the light and space in the home.

DMVF Architects

Doyle and his staff removed the home’s first low ceiling and added a plywood cube, each side with its own purpose. The kitchen takes one side, access into the shower area is around the corner, a sleeping loft sits on the very top, and also this side holds storage and a little utility area. “It became evident very quickly during the design procedure that every last inch of space needed a specific purpose and dedicated usage,” says Doyle.

Before Photo

BEFORE: Water seeping in through a leaky roof caused damage throughout the home. Unoccupied for the past ten years, the house had no functioning gas or electric system. The kitchen has been terribly outdated — an awkward mix of styles and tastes from various eras.

DMVF Architects

AFTER: The back side of the cube now holds the kitchen and extra storage. The railing above opens into the bedroom near the peak of the cube, which faces back windows and skylights. Nothing exists from the previous kitchen sleek cabinetry, durable countertops and modern appliances now make up a simple space which works perfectly for another home.

DMVF Architects

Because the cabin was left unoccupied and in a terrible state for such a long time, it was difficult for the client to envision the way the interior could eventually become livable. While she wanted it to be comfortable and full of light, she didn’t have any preferences stylewise, so Doyle and his group were basically left with a blank slate.

Before Photo

BEFORE: The initial living area was obsolete and suffering from severe water damage. Wallpaper peeled from the walls, and old linoleum covered the floors.

DMVF Architects

AFTER: though the cube occupies about half the floor area in the house, it allots far more living space than the initial divided layout did. “This endeavor was about working from the minimum upward,” says Doyle. “We looked at the minimum dimensions of each one of the elements or purposes, and allocated space to them then.”

DMVF Architects

Stairs built into the plywood cube lead until the sleeping stage.

The home’s small size produced work challenging for the building group, especially with no outdoor backyard to retreat to. Doyle had to make certain only a couple people were in the home at precisely the exact same time, so construction could be safe and productive.

DMVF Architects

A surprisingly spacious loft takes advantage of the cottage’s sloped ceilings. Large skylights allow in afternoon and evening light but keep the space from getting too bright in the daytime. Closet and storage area built in the wall removes the requirement for a dresser or wardrobe.

See related

Summer Plants: How to Grow Peppers

You can fill your backyard with peppers and it wouldn’t be boring. With sweet peppers and hot peppers; white, orange, yellow, red, green, brown and purple peppers; big peppers and tiny peppers; and round, ruffled, bell-shaped and peppers that are long, there’s enough variety to satisfy any pepper enthusiast.

Peppers are usually split into two broad classes: sweet peppers and hot peppers. The best-known sweet peppers are bell peppers, however there are plenty of others on the market, a lot of which are amazingly flavorful. Sexy peppers live up to their name. They get their essential hotness in the capsaicin they contain, along with the hotness can vary from slightly above mild to cool. Some hot peppers resemble sweet peppers, so be sure to check exactly what you’re planting.

All peppers need the exact same growing conditions, although hot peppers take a little more time to mature and like it a little warmer.

Note: While peppers love warm weather, nighttime temperatures consistently above 75 degrees Fahrenheit (24 degrees Celsius) can result in a bad harvest.

Barbara Pintozzi

When to plant: Start seeds indoors six to eight weeks before planting into peat or fresh pots; set out seedlings at least one week following the last freeze date and when soil temperature has reached at least 65 degrees Fahrenheit (18 degrees Celsius).

Days to maturity: 60 to 120 after transplanting

moderate requirement: Full sun

Water necessity: Frequent


Favorites:
Sweet peppers: Ace, Apple, Baby Belle, Bell Boy, California Wonder, Giant Marconi, Golden Bell, Gypsy, Jingle Bells, big sweet cherry, Lilac Belle, mini chocolate bell, mini red bell, mini yellow bell, Pepperoncini, Purple Beauty, Red Heart, Red Ruffled, Sweet Banana, Sweet Chocolate, sweet pimiento, Tequila, Valencia, Yolo Wonder Hot peppers: Anaheim, ancho (poblano), cayenne, habanero, Hungarian Hot Wax varieties, jalapeño, Mariachi, Mirasol, Mulato, NuMex Pinata, NuMex Suave Red, Padron, Pasilla, serrano, Tabasco, Thai Dragon, Thai Hot, Trinidad Perfume

Andrea Meyers

Planting and maintenance: select a website with abundant, well-draining soil in sunlight that is sheltered from end — warmer conditions mean hotter peppers. Wait until both soil temperatures and outdoor temperatures have grown. Sweet peppers like temperatures at 70 to 75 degrees Fahrenheit (21 to 24 degrees Celsius) during the daytime, whereas hot peppers like it even warmer, up to 85 (29) degrees.

Dig approximately 1 to 2 1 1/2 feet deep and add compost or another rich organic matter into the planting site. Place plants 1 1/2 to 2 feet apart, settling them in only slightly thicker than they had been planted in their developing pots; space rows 2 to 3 feet apart. Taller peppers might require staking or caging; if you think you’ll want support, it is best to put it in place at this moment. If cutworms are an issue in your region, add collars around the young seedlings.

When growing space is limited, plant berries with little fruits in containers. Select a pot that is at least 18 to 20 inches in diameter and feed gently throughout the growing season.

Whether in the garden or in pots, keep the soil consistently moist but not soggy throughout the growing season. Do not despair if elevated temperatures trigger a loss of petroleum production; regular care, such as watering, will help ensure that production will increase when the weather cools down. When the soil is reliably warm, mulch to retain moisture and prevent weeds.

Feed plants with a low-nitrogen liquid fertilizer since they set blossoms, but don’t overfeed. A fertilizer designed for tomatoes is a good option. Many experts suggest spraying the leaves and blossoms with a diluted solution of magnesium sulfate, or Epsom salts, at this opportunity to increase production.

Though peppers are usually sturdy, armyworms, aphids, some beetles, caterpillars, corn borers, mites and whiteflies may cause occasional issues. If viruses are an issue in your region, start looking for varieties which are resistant and rotate plantings.

Harvest: Cut fruit in the plant with scissors or pruning shears. Harvest sweet peppers once they’ve reached full size or allow them to continue to color; they’re sweeter the more time they ripen. Pimientos are an exception; don’t harvest until they are reddish.

Harvest hot peppers once they reach full size. You can select them while they’re still green or wait until they turn red or yellow for a more complex flavor. As a precaution, wear gloves when harvesting and keep both hands and gloves away from the face, especially your eyes.

Best advice: After picking or utilizing hot peppers, wash your hands thoroughly, then rub them with vegetable oil, then wash them again.

See related

How to Get Ready for and Live With a Power Outage

You likely know the ominous feeling: As a storm or storm sweeps throughout your community, you’re huddled safe in your home or in a nearby refuge … and with no warning, the lights wither and perish. You’ve lost power, and experience says it could be some time before you receive it back. What do you do today?

If you’re one of the lucky people with a generator, the moving won’t be so bad, and you can live in relative comfort until the power’s back on. But generators could be costly, beyond the reach of many people. When a storm is coming and you could be facing days or weeks with no power, these measures can help you make it through.

Westborough Design Center, Inc..

Strategy early. When a big storm is bearing down, there’ll be a run on water, propane, mobile figurines and other essentials at local stores. Keep as a number of these items as possible on standby so you don’t get caught in the beat or, even worse, confront a deficit.

Stock the pantry. Have available nonperishable products that offer loads of protein and other nutrients and may be eaten cold: peanut butter, whole-grain crackers, energy bars, beef jerky, canned and dried fruit and so on. Make sure you’ve got litter, food and other supplies available for pets too.

Do not forget to maintain a manual can opener nearby. And stockpile lots of bottled water or water in jugs for drinking.

Make or buy extra ice. If you know there is a storm headed your way, load up on bagged ice in the supermarket or fill zip-top plastic bags with water and freeze them to create cold packs. Utilize them in the fridge, the freezer and simmer to maintain milk, milk and other perishables at a safe temperature as long as possible.

Get meds filled. If you’re running low on medication and the power is out at your local pharmacy, you could be in a bind. Get your next wash and keep it handy.

Crate&Barrel

Weber Performer Grill – $349.95

Get your grill ready. If you can not use your cooker, you will want to have an alternative way to cook. For gas grills, have extra propane tanks on hand; when the grill is connected to a natural gas line which may be affected by the storm, then it’s worth buying or planting a charcoal version. Lay in a supply of charcoal, in watertight containers to keep it dry when needed.

Remember to grill outside only; do not hesitate to bring the grill inside, no matter how cold or wet the weather is. At a pinch you can channel your scout days and fashion a makeshift oven. Utilize the oven outside, away from any flammable surfaces, and extinguish the coals promptly after cooking.

Know where your lanterns and flashlights are. It’s a good idea to keep at least one or 2 in an easy-to-reach place on every floor of the house. Consider flashlights which are powered by winding or another nonbattery method.

Charge your phone and other electronics ahead of time. Then use them as sparingly as possible; power them down or off when you do not need them. If you have car chargers, you can top off the charge occasionally when required. And while we’re discussing automobiles, fill your gas tank before the storm hits.

More ways to Remain charged and connected when the power goes out

Bed Bath & Beyond

O2-Cool Battery-Operated Fan, Black – $29.99

Get laundry completed. Your washer and dryer will not function while the power is out. Wash as many loads as possible prior to the storm so you will not run out of clean clothing while the power crews do their thing.

If necessary, have a portable heating or cooling supply. In hot climates or in the middle of summer, you might not have air conditioning; in winter, you could be without heating for some time. Buy a few cheap battery-operated fans (and lots of extra batteries) and/or propane heaters. If you’ve got a wood-burning fireplace, make sure there’s lots of firewood to fulfill it.

With propane heaters, security is key — they’re not designed for small or poorly ventilated spaces. Use them on your largest room and do not run them; use them just to keep the room warm enough to avoid compromising your health. Stay bundled up in sweaters, hats, gloves, extra blankets and socks.

Additionally, know when to run and cut. If you’re not able to keep the house warm or cool enough for many family members to remain safe, go to a nearby resort or refuge, or go to a buddy or family member’s house in an area not affected by the storm.

Jones Design Build

Conserve water. Fun fact: A typical family of four goes through nearly 300 gallons of water a day, much of it hot. A gas water heater may work even when the power’s out. An one clearly won’t. Use hot water sparingly to allow it to last as long as possible, but with no heating source, it is going to start to cool quite shortly. If you have to, you also can heat water onto the grill or over the fire.

With water that is well, you’ll lose pressure in the event the pump change will not work. If you do not possess a supplemental storage tank built into your own system or a portable generator which powers the pump, then fill big tubs or your bathtub with water which it is possible to dive into for flushing toilets or sponging off. Never drink water during or after a power outage until you’re certain it’s not contaminated.

When you’ve got a generator, offer to help. Do everything you can to make life easier for other people in your area. Let neighbors bill telephones or take a warm shower, or prepare hot food to send to older residents or families with young kids. Should you have Internet access, you may even use the power of social networking to spread the word about individuals locally who may be in need of immediate assistance.

How to Pick the Ideal Generator

See related

Pretty Up Pumpkins With Paint

To mention that my husband doesn’t enjoy carving pumpkins is a understatement. We’ve got a 7-year-old, so Halloween is a big deal in our house, and every year we bring home a carload of bulbous orange beauties from the pumpkin patch. As my son and I gladly pick the best ones to become jack-o’-lanterns, I can see the look of dread in my husband’s eyes. Last year he just mutinied, giving me the knife reappearing only after he detected the odor of pumpkin seeds roasting in the oven.

Needless to say, I’m now the designated pumpkin carver in the house by default. However, I will mix it up somewhat and try painting a few of them, which can be neater, less tedious and a whole lot more child friendly than hacking at them with a chef’s knife. Onboard with the idea? Follow my lead and check out these pretty painted pumpkins for inspiration.

Rikki Snyder

Metallic paint autumnal orange lends gentle shine to these tiny pumpkins. This is a good way to highlight their beautiful curves and ridges while staying true to their natural colour.

Hint: Pick the most straightforward, firmest possible pumpkins for painting — dips, soft spots and knobby growths will make it trickier to get an even coating.

FOCAL POINT STYLING

A mini pumpkin in gold gowns up a drop place setting and echoes the brass candlesticks.

Pullga

A ruddy bronze hue and playful polka dots give these pumpkins the appearance of upside-down toadstools.

Hint: Gently wipe pumpkins using a moist cloth or sponge to remove dust and dirt (you might need to wash them under a faucet or hose should they have caked-on sand). Towel dry or air dry them entirely.

Rikki Snyder

Do not be afraid to use unexpected colors. Light blue is not a color you usually think about for Halloween, but it makes such a perfect partner for orange that I wonder why we don’t see more about it.

Pick a colour that blends with the scheme of the space to create a sleek effect. Within this darkened area, white painted pumpkins seem strikingly sculptural against the pristine backdrop.

Hint: Before you paint, apply a coating of multipurpose sealer, which helps to preserve the pumpkin and assists the paint to adhere. Permit the sealer to dry thoroughly.

Rikki Snyder

In a similar way, these ghostly pumpkins comparison with spare black branches to get a stripped-down group that’ll delight minimalists.

Seaside Interiors

Keep it easy by painting a little design onto each pumpkin rather than covering the whole thing. Letters on this trio spell out a spooky message and perform up the black and white palette.

Hint: Spray paint works best if you are painting the pumpkin a single colour. If your layout is much more complicated, brush acrylic paint for better control.

Silver pumpkins shine in this trendy display, but that’s not the only notion here. Consider embellishing a painted or unpainted pumpkin using nailheads — used here as a monogram — or hammering it with metal studs. Happy Halloween!

Hint: Keep pumpkins in a cool spot away from strong sunlight to preserve them as long as you can. Depending upon your climate and whether you display them indoors or outdoors, they’ll last at least two or three weeks, and sometimes more.

See related

Texas Gardener's October Garden Checklist

Fall is finally here, so take a big, deep, crisp breath. Your summertime cleanup is finished, and now it’s time to plant, plant plant. Fall is the absolute best time to receive plants in the floor, as it gives them two cooler weeks to set deep roots. Plants put in now and next month will be much larger, will blossom better and will be more drought tolerant next calendar year. What exactly are you waiting for? Get out your trowel and shovel and get digging.

J. Peterson Garden Design

Planting

Wildflower seeds. October is the perfect time to plant those seeds if you would like a little all-natural accent in your garden or if you’re intending to create a wildflower meadow or prairie. Try out bluebonnets, coreopsis, poppies, Indian paintbrush and Indian costume.

Pay particular focus on bed and dirt preparations as you sow these seeds select a sunny site, till up all the present grass and weeds, incorporate up to 1 inch of compost, sow seeds according to package directions and water in well.

J. Peterson Garden Design

Annual flowers and ornamental plants. So many cool-season annuals can be planted this month — pansies, violas, snapdragons, alyssum, dusty miller, calendulas, poppies and nasturtiums are all fantastic choices. If your place is having a bit of an Indian summer with higher temperatures, make sure you hold off another week until things cool off a bit.

Use annuals and other ornamental plants, like cabbage and kale, in containers in addition to in the fronts of the beds and borders as slower-growing accents.

J. Peterson Garden Design

Trees, shrubs and perennials. Look around to see if any of your mature shrubs or trees are showing signs of demise after last year’s devastating drought and warmth — it often requires a complete year to observe the harm. If some of your bigger plants are on the downslide, take the chance now to remove them and replant. The same goes for your perennials, as autumn is the perfect time to get them in the floor. Try out salvias, columbine, yarrow and esperanza in addition to ornamental grasses.

J. Peterson Garden Design

Naturalized bulbs. Many bulbs, like tulips, require a cooling period to obtain energy to regenerate following spring. Those types do not work really well in our gardens (zone 7a to 8), as the weather simply does not typically get cold enough. Not so with naturalized bulbs, that can be well suited to our environment. Try out daffodils, bearded irises, muscari, spider lilies, oxblood lilies, crocuses, alliums and anemones. These bulbs usually like bright areas and needs to be planted at a depth of 3 times the width of the bulb.

J. Peterson Garden Design

Vegetables. Cool-season vegetables are so abundant and healthy, so attempt to tuck in a couple of new ones this year. Broccoli, turnips, cauliflower, spinach, Chinese cabbage, lettuce, cabbage, collards and other greens can also be planted now. If you’re expecting a hard freeze, consider adding some row cover to protect your veggies, but otherwise these plants will take the crisper weather in stride and provide you months of produce.

Ground covers. Ground covers are important for erosion control, as a low-growing accent in front of a border or as a way to compensate for grass that will not grow beneath a shade tree. Choose Asian lavender, lamb’s ears, mondo grass, liriope, ajuga or periwinkle. Be sure you know which floor covers like bright websites and which ones prefer shadier conditions, and you’ll be rewarded with lush growth and decent coverage.

The Todd Group

Care

Care for your lawn. Be on the lookout for “brown patch” disease on your lawn, particularly in the event that you have St. Augustine grass. It seems as dead grass in a doughnut shape with fairly green grass in the center. Additionally, take a peek at the base of the grass blades although the blades themselves can look lifeless, the base of them is typically green if you have brown patch. This disease is caused by many things — improper watering and fertilizing, together with warm evenings, are a few of the more common causes.

When you have properly identified your grass issue and are confident you’re dealing with brownish patch, then you’ll need to use a fungicide to kill it. Should you use a fungicide and you do not have brown patch, then the remedy is going to do your grass no good. Consistently follow the package directions for the best result.

Check out more early-fall lawn tips

www.KarlGercens.com

Divide perennials. Transplant or share your branches of timber ferns, cannas, shasta daisies, bearded irises, violets and daylilies. Over the years these plants create bigger spreading growth, which can crowd out other plants and contribute to diminished blooms.

Carefully dig them up — I like to use a tined garden fork for this — and then gently separate the root ball with your fork, shovel or hand pruners. Immediately replant your branches, or share with your neighbors, for double the amount of plants at no extra cost.

More guides to Texas gardening | Find your U.S. garden checklist

See related

Mid-Atlantic Gardener's October Checklist

In the ever-changing leaves of oaks and maples into the harvesting of fall edibles, fall is a time of beauty and bounty. October is the month when all the hard work at the garden pays off, the natural world says farewell to some year with a bang of vibrant colour, and the weather is more gorgeous than it is going to be for the remainder of the year. Don’t miss it. Throw open these windows, choose long day walks and delight in the very last bounty of this yummy season!

Amy Renea

It’s the very end of this late-summer crop, so collect the bounty as you can. You may still have potatoes to crop if you planted a second batch in summertime. Mine have bloomed and are only beginning to turn brown. From the end of this month, they’ll be ready to pull out of the ground prior to a legitimate frost strikes.

Amy Renea

Hint: Together with the nights cold and the days hot and sunny, tomatoes and eggplants can endure under a blanket of burlap or other defense.

Produce a tabletop arrangement with the fall harvest

Jocelyn H. Chilvers

Seedpods are everywhere you look, and the following effects of blooming can be even more amazing than the blossoms.

Jocelyn H. Chilvers

Take pleasure in the beauty but make certain that you cut down any plants which may infest your garden with tens of thousands of unwanted plants. An area of Queen Anne’s lace seedpods is amazing to look at, but oh my, the havoc it will wreak on your summer garden next season!

Amy Renea

Still have blooms on pumpkin and gourd vines? Cut off them. At this point in the season, you want the fruit that’s already on the vine to ripen instead of fresh fruit developing. There isn’t time for fresh fruit to grow to adulthood, so give the existing pumpkins a increase by plucking those blossoms until they get started.

Amy Renea

Herbs are plentiful all fall, but they’ll disappear sooner than you can say “Jack” when frost comes knocking. Harvest mint, lemon balm (shown), rosemary and other people to keep them for winter. Dry the herbs, chop and freeze them or use them in soaps to get new herbs.

Amy Renea

Following your herbs possess dried, consider making your own tea mixes for winter. I blend stevia (shown) with numerous herbs for exceptional and cheap teas. So long as I have new herbs, though, I will brew up a batch every single day until my luck runs out.

Amy Renea

While you’re maintaining edibles, consider preserving a few blossoms too. Flat flowers like zinnias press nicely, while large bunches like hydrangeas dry well as big clumps.

D-CRAIN Design and Construction

Grasses are in all their glory in October. They seem best in drifts at which the end can ripple through them like water.

Wagner Hodgson

Trees will also be beginning to put on a display. At the beginning of the month, you’ll start to find the tiniest hint of colour.

Mid-October brings bolder and brighter screens which are as magical as they are spooky at the early-morning fog.

Obviously, the real show is in late October, when the trees wear a symphony of colour and move out in a blaze of glory. There is nothing better.

See related

Graphic Vintage Style in an East London Townhouse

From vintage fashion posters put against stark white walls to handpicked furniture, style writer and journalist Hywel Davies’ terrace townhouse carefully accounts functional flow with perfect spaces for entertaining. “I opted for white walls and dark flooring to serve as a blank canvas for my own accessories and furniture,” he says, “which is where I feel that the main design personality is found.”

When Davies bought the house a couple of decades ago, he set to work straight away, ripping out all the carpets, stripping off the floorboards, installing a new kitchen and knocking down walls. Then he included his own decorative touches to produce the light and bright space match his fashion-forward style.

at a Glance
Who lives here: Hywel Davies and his partner
Location: Lower Clapton, Hackney, East London
Size: 160 square meters (1,722 square feet); 3 bedrooms, 1 1/2 baths

Beccy Smart Photography

Davies describes his design design functional and basic, with a mixture of vintage and new. He sources most of his furnishings out of London’s secondhand shops and out of economies in Berlin and Paris.

He highlights subtle symmetries in each of the house’s spaces. This pair of black leather armchairs is from a Royal Air Force base.

Beccy Smart Photography

A well-worn chesterfield leather sofa from John Lewis adds soft lines into this linear space and contrasts with the zigzag floor lamp. Stacked industrial-style stools are at the ready for when Davies entertains.

“The living room is my favorite place in the home to relax, as it is only a staircase from my cellar study,” he states.

Beccy Smart Photography

Black Eames dowel-leg side seats make a statement around a 1960s Danish table. Davies is attracted to the clean lines of Danish design and frequents the Danish Homestore in Nottingham.

Beccy Smart Photography

Stairs lead down in the primary entryway into this ground-floor kitchen. The kitchen and dining room lead straight onto a recently additional garden deck.

Beccy Smart Photography

New skylights keep the kitchen space open and encourage flow in the kitchen into the backyard deck. An upholstered armchair at the head of the table can easily become a reading nook throughout the day.

Beccy Smart Photography

The biggest and most costly part of the remodel was cladding the brand new kitchen in stainless steel. Davies chosen to get a couple of open shelves to minimize clutter.

Beccy Smart Photography

Davies added a backyard deck, where he enjoys dining and where he keeps a small range of potted plants.

Beccy Smart Photography

This is an opinion of the home from the rear of the massive garden. “My notion of gardening is becoming someone else to do it,” Davies says.

Beccy Smart Photography

Upstairs, he included a wall sticker of a world map to accent the blank wall between the 3 bedrooms.

Beccy Smart Photography

A unique industrial-style vest found in a secondhand store also sits in the hallway between the bedrooms

Beccy Smart Photography

Within this guest bedroom, also at the other bedrooms too, Davies splurged on genuine Fog & Mørup pendant lighting.

Beccy Smart Photography

The master bedroom keeps exactly the same minimum, neutral color palette as the rest of home.

Beccy Smart Photography

Davies collects graphic design posters. Hanging here’s a poster commemorating the 50th anniversary of the font Helvetica.

Beccy Smart Photography

Davies repurposed a vintage crate for a TV stand, which conveniently hides the wires behind.

Beccy Smart Photography

He knocked down walls to combine two small bedrooms into a big bathroom. A gray claw-foot tub has a view of the backyard garden. From the corner, built-in shelves hold towels and other essentials.

Beccy Smart Photography

The large walk-in shower includes classic white subway tiles.

Beccy Smart Photography

Davies chose an old-fashioned bathroom throughout the renovation to increase the vintage, traditional feel. Along with the tub, it is a surprising highlight of the space.

Beccy Smart Photography

An additional guest bedroom with Orla Kiely bedding and a classic leather welcomes guests and guests.

Beccy Smart Photography

See more photographs of this Home

See related

Tiny Amsterdam Apartment Bursts With Character

Although this Amsterdam rental already had sufficient character, interior designer Rosa van den Kerkhof and Dirk van den Wijngaard turned into a cozy home that oozes with personality. A composite of antique bits, new industrial furniture along with cultural treasures mixed in from world travels gives this little, light-filled home a playful and diverse appearance.

in a Glance
Who lives here: Rosa van den Kerkhof and Dirk van den Wijngaard
Location: Amsterdam
Size: 65 square meters (699 square feet); 1 bedroom, 1 bathroom

Holly Marder

Van den Kerkhof dwelt at the apartment upstairs for nearly six years before this one became available. The hardwood flooring and the flat’s charming original features, for example, marble fireplace surround and high ceilings, instantly attracted the couple. “There was also central heating!” she laughs. “If you have ever spent a winter at a high-ceilinged, drafty old apartment in the Netherlands, then you’ll know that is an instantaneous selling point”

Holly Marder

The founder of her own interior design business, Studio Nest, van den Kerkhof loves to mix several design styles. “An interior is an extension of your personality,” she says. “I think it’s boring to stick with just one style.”

This cognac leather armchair was a lucky find on the Dutch secondhand website Marktplaats. Piles of magazines within arm’s reach plus also a large pouf turns the formerly empty space between the living and dining rooms into a comfortable dining room.

Holly Marder

In the living room, the couple paired a contemporary charcoal grey sectional with a classic chair, graphic black and white rug, and an array of textured cushions.

Van den Kerkhof initially studied theater design until she realized it wasn’t the ideal match. The correlation between theater and home design led her into the world of interiors. “If you style theater, you’re translating a story into scenery, so it is quite like designing an interior, except that it is a more tangible and durable kind of design,” she says.

Holly Marder

“I like things that are utilized, that have a story inside them,” van den Kerkhof says. “I feel it enhances the appearance and feel of a room.”

This lotion classic leather chair was her very first classic purchase, and, to this day, it is one of her favorite pieces.

Rug: Ikea

Holly Marder

“Working in the interior design industry has certainly influenced my style,” van den Kerkhof says. During her interior styling studies, she worked in Baden Baden, the former showroom of the iconic Dutch designer Piet Boon, whose style combines modern elements with renewable materials. “I heard a lot about styling out of my colleagues and has been highly influenced by Piet Boon’s symmetrical style. I have since tried to let go of a bit so as to produce my own style.”

The tray table is a gift from her father, who has traveled extensively around the world.

Holly Marder

This collector’s item classic armchair is another bit awarded to van den Kerkhof from her father. When he was young, he painted it without recognizing its own value. It’s one of her favorite bits — here, she has paired it with an inexpensive classic stool she recuperated.

The few latest purchase is that their Foscarini Diesel Fork floor lamp, which adds a bit of functional chic to the room while adhering to contemporary lines.

Shelving unit: Expedit, Ikea

Holly Marder

Van den Kerkhof gave a classic French cabinet a fresh lease on life with charcoal grey paint and some new grips from Zara Home. The item now provides functional storage for the couple’s TV.

The apartment sports a warm color scheme of black, white, gray and neutral tones, with the exception of a couple of well-placed bursts of color. “I adore gray combined with timber for a warm appearance,” she says.

Holly Marder

A low console is home to books, music, artwork, drinks and another one of the few favorite items — a lovely lamp that van den Kerkhof purchased while functioning at Baden Baden.

Above the console, a gallery screen features framed artworks by South African artist Marlene Dumas, a Matisse print, an Etsy artwork print and functions from an assortment of artwork called “Vita Brevis Ars Longa” (translated: “Art Is Long, Life Is Short). Van den Kerkhof painted the dog picture when she was 15.

Holly Marder

Even though the apartment doesn’t offer much in the means of space or storage, the couple love their home for its own authenticity and original detailing.

At the dining area, bright tangerine lamps draw the eye up, toward the high ceilings, and highlight the stunning original sash windows with stained-glass detailing.

Pendants: Arne Jacobsen for Louis Poulsen

Holly Marder

Van den Kerkhof has carved out a very small workspace at the corner of the apartment, which is where she does each of her design work and meets with customers.

The desk chair has been found abandoned on the side of the street near a trash bin. “It was dirty and old, and it has a paint mark on it. Most people would say it is trash, but I really like it!”

Drawer unit: Alex, Ikea

Holly Marder

This cherished sideboard spent nearly all of its life in van den Kerkhof’s parents’ living room. When she went away to study, the cabinet went with her. Having experienced a few facelifts, from white to deep red, its fresh pale grey hue and fresh knobs create the perfect addition to the dining room.

In addition to the classic sideboard,a wooden tray is used as a foundation for a vase, a little book bought during a weekend in Paris, brushes and pencils used during her studies, along with a stone her father gave her when she was young. A candlestick out of Ikea gives the arrangement height.

Holly Marder

Renting can be a limiting design factor, so the couple made the kitchen their own by accessorizing it with pretty and practical items. Wood cutting boards provide a soft accent contrary to the kitchen’s white tiled walls.

A single shelf holds a collection of decorative blue and white china bowls, crisp white kitchen accessories and some of their favorite cookbooks.

Holly Marder

A silver Moroccan sugar cup and pot are a part of a group given to van den Kerkhof by her father. The matching tray table is in the living room. When her father was young, he worked on a ship and traveled a lot, collecting bits and pieces on the way. Van den Kerkhof pairs those treasures with functional utensil storage beside the stove in kitchen.

Holly Marder

Floor to ceiling drapes in a soft latte color accentuate the bedroom’s large ceilings. Crisp white bedding is a soothing background for a contrasting black ring lamp.

Holly Marder

Outdoor space comes with a hefty price tag in this portion of earth, so the set was happy to have this balcony to enjoy warm weather.

Holly Marder

A comfortable sofa in the balcony overlooks the enchanting Dutch style architecture where Amsterdam is famous.

“The place we live in is really beautiful, with lots of cafes and stores, along with also a food market on Saturdays,” van den Kerkhof says.

telephone: Do you live in a creative downtown apartment? Discuss it with us!

See related

DIY: Make Your Own Chalkboard Paint

Chalkboard paint is famous due to its mix of sentiment, whimsy and practicality. Whether it’s painted on walls, furniture or appliances, chalkboard paint has surely come a very long way in the fundamental green or slate gray boards utilized in colleges.

I really like the use of chalkboard paint in bizarre ways — like on the back of a kitchen island or in place of a headboard — but I am also a classic girl at heart and a fan of those easy chalkboard. My son’s nursery to large child room’s transformation needed streaks being painted by me, and I couldn’t resist throwing a chalkboard to the mix.

Meg Padgett

Chalkboard paint is offered in varying shades of color through manufacturers like Hudson Paint, but at $25 per quart, it could get expensive. Save your pennies and have complete control over the color by simply making your own in three steps.

Meg Padgett

Materials:
Non-sanded groutLatex paint in any color Mixing cup or cup
Brush or rollerPaint mixer drill attachment

Meg Padgett

1. Mix the latex paint with the non-sanded grout at a cup or cup. A good ratio to use is 1 piece grout to 8 parts paint. So, if you are mixing a small amount, combine 1 tablespoon grout with a 1/2-cup paint. To get a bigger amount — like I used — combine 1 cup of grout with a 1/2 gallon of paint.

Make sure that all the grout is mixed in — otherwise, the granules may be observable on the chalkboard. I have found that a 5 gallon bucket and a paint mixer drill attachment would be the simplest and most efficient way.

Note: Grout is generally only available in massive amounts — 10 pound boxes for approximately $12 — so plan accordingly. I knew I would be regrouting the shower and bought the Polyblend Non-Sanded grout to match. Do not have any plans in your future? You could have a friend who recently tiled a entrance or bathroom, so ask to use some of theirs.

To decrease the sheen at the high-gloss black “oops” paint I picked up at a discount and achieve the classic charcoal color I wanted, I mixed a 1/2 gallon of this black paint with 2 cups of white ceiling paint, then added the grout.

Meg Padgett

2. Paint the paint on the surface. Prep the surface as you would for any paint job. I painted two coats to get protection.

While I’ve employed a classic charcoal gray, the color choices are endless. Make chalkboard paint out of your left wing wall paint to get a seamless and enjoyable addition to a room or go bold with a bright, contrasting color.

Meg Padgett

3. Condition the chalkboard. Make your chalkboard ready for drawing by massaging the board with chalk, then wiping it off with a dry towel in circular strokes. With that final step, it is ready to be put to good use.

Meg Padgett

In my son’s room, I’ve gone large by painting an entire wall with chalkboard paint and framing it to make a spot that can be used for both educational and play activities.

More: Grown-Up Suggestions For Chalkboard Paint

See related

Believe Ginseng for Kitchen Countertops

Old-fashioned and elegant, zinc countertops imbue a kitchen with dignity and warmth. A mainstay of Parisian bistros, oyster bars and butler’s pantries, zinc often gets overlooked in favor of trendier stainless steel or tried and true stone. Nevertheless this classic material adds a singular character that contrasts, chameleon-like, into some kitchen design and installation. Read on to learn whether it’s for you.

More: How to Remodel a Kitchen

Aquidneck Properties

The Experts of Zinc

A classic patina. Magnesium carries a dull, slightly mottled surface that has more in common with pewter than with chrome or stainless steel. It looks seasoned even when it’s fresh, and it has an inherent heat that many metals lack.

Zinc typically starts out pale gray and develops a slight blue to green throw because it darkens with use and time. Its natural tarnish can be slowed somewhat with a coat of beeswax now and then.

Antimicrobial possessions. Zinc naturally resists mold, mildew and bacteria.

Stain resistance. Though zinc may react with specific substances over time, spills and splatters will not blot it in the way that they might with a porous material like marble or limestone.

Kemp Hall Studio

Malleability. Since zinc is relatively soft, it’s easy to have the advantages molded into interesting shapes and border treatments. It can also be hammered or textured to add visual depth and attention.

Versatility. Zinc works well in any area of the kitchen, from islands and breakfast bars to prep surfaces.

Ease of care. A fast swab-down with water and a gentle dish soap keeps zinc clean.

Cabell Design Studio

The Disadvantages of Zinc

Susceptibility to dents. The exact same softness that makes zinc easy to manufacture also suggests that cookware and knives can scratch its surface. If you would like to maintain your countertop looking fresh, scrapes and nicks have to be buffed out occasionally.

Susceptibility to heat. Prolonged exposure to a hot item, such as a pan straight from the cooker, can render an undesirable mark on a zinc countertop.

ARCHIA HOMES

Tricky installment. As with other metallic countertops, zinc can be difficult for the average homeowner to install. It must be fastened to a substrate, and technical ability and experience are required to ensure a smooth surface and prevent scratches from showing.

Price. If you’re on a tight budget, zinc can blow it to pieces. Zinc starts at about $100 to $120 per square foot. If you’re determined to integrate it, then consider restricting it to a little section of counter space like an island.

More:
guides to kitchen counters
How to Remodel a Kitchen

See related