The best way to Lay Checkerboard Sod

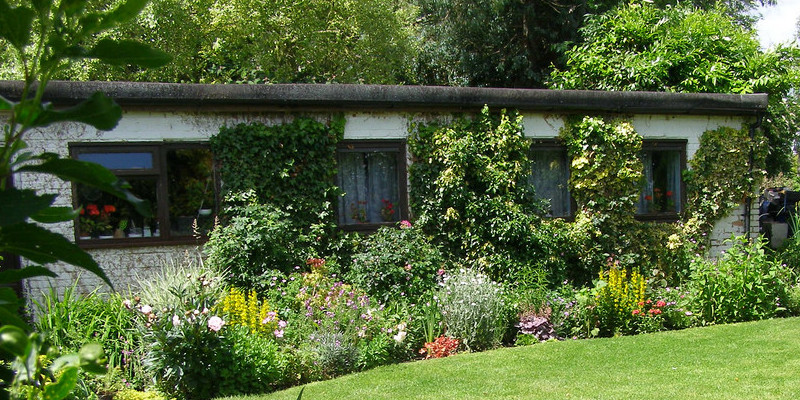
Sod that is checkerboard doesn’t include laying parts of sod out in your garden to resemble a checker-board that is gigantic. It refers to the procedure for installing sod with finish joints that are staggered. As you install sod in a checker-board pattern, the roots in the ends of the bits of sod may fuse together to to create a patch of turf that is new. While you might consider employing a contractor to to put sod in your garden, it’s a task a DIYer can total. The garden that is new is certain to enhance the curb appeal of your house.

Purchase a soil test kit or contact a soil screening organization to get a kit. Take examples of of your soil subsequent instructions in the soil test package. Return the kit to the soil screening organization or to the address on the package label. This procedure might have several weeks to accomplish. The outcomes will show just how much fertilizer you need to include to the soil.

Remove any grass that is outdated . Scrape off the top layer using a sod cutter, which it is possible to rent from a nursery. Remove tough to reach places using a shovel. Remove any rocks or other particles in the surface of the garden, as you pick up the layer of grass.

Fertilize the lawn according to suggestions in the soil test package. Add lime to the garden at the same time, if required. This increases conditions for grass positioned near trees. Spread the fertilizer and lime using a backyard spreader.

Till the fertilizer to the earth using a garden tiller. Set the tiller to turn 3 to 4 inches of s Oil over.

Smooth the area having a backyard rake. Take them off in the event the tiller turned-up any huge clods of grime or stones.

Push a garden roller within the s Oil that is ready to the s Oil that is compact and end leveling it. Prevent walking onto it, as soon as you end rolling the garden. Keep kids and animals from disturbing the s Oil at the same time.

Unroll sod parts. Starting in other straight-edge or the side walk, spot each strip of sod contrary to the kick off point. Butt edges however don’t overlap them.

Joints of rows of sod to create a checker board routine. Trim sod parts to to match, having a utility knife, as necessary. In case the floor h AS a slope, support the the sod in spot with sod staples or stakes.

Push the roots to be ensured by the garden roller total the sod items have excellent experience of the s Oil underneath.

Water the lawn subsequent suggestions of the sod business where the sod was you bought by you. Program this task throughout seasons of the yr when constraints aren’t in location, if watering constraints may be a problem.

See related

Shrubs That Create Pinecone Kind Flowers

Although you enjoy the design of cones however do not like to step on them or pick them up off the floor in the drop, select shrubs that have flowers like pinecones as the the background of your backyard. The majority of these kinds of flowers have flesh that is softer and are smaller than pinecones. A few of these shrubs remain green all year while the others shed their leaves, therefore pick the best shrub to your landscaping needs.

White Alder

The deciduous white alder (Alnus rhombifolia) is indigenous to California and can grow in very moist soil over the Westcoast. It is also employed as a shrub or hedge in landscaping for the reason that it grows out nearly just as much as it develops, despite the fact that it may grow to tree size. It grows rapidly, therefore normal pruning is needed to keep it at peak. Its flowers appear in March and are shaped like pinecones that are tiny; they’re no more than an inch-long.

Greasewood

Also deciduous, the greasewood shrub (Sarcobatus vermiculatus) can develop to 8-feet high and is identified throughout the western United States. The branches of the shrub usually develop several inches apart, providing a look to the shrub. The plant generates two kinds of flowers: one that’s cone shaped, green using an impression of red, and one that’s open and funnel-formed. These shrubs are drought-tolerant and flourish in full sunlight.

French Lavender

Thriving in U.S. Department of Agriculture hardiness zones 8 through 11, French lavender (Lavandula dentata) is an evergreen perennial shrub that provides the advantages of developing an herb. The slender, cone shaped blooms saved and may be dried in sachets in your drawers. Some folks appreciate steeping the blossoms in tea at the same time. The grey-green, fuzzy leaves provide colour to enhance other evergreens and a fascinating texture. It grows best-in properly-draining s Oil in full-sun.

Flamingo Plant

In spite of the fact that it’s considered a tropical plant, the flamingo plant (Justicia carnea) is a bushy ever-green shrub with coarse, darkgreen leaves and colourful blooms. The cone shaped flowers are obtainable in a number of colors, including white, pink and yellow. The plant can attain 3 to 7-feet large and grows best-in zones 8 through 1 1. It may spread up to 3-feet out. This shrub is gradual-developing and flowers in summer.

See related

Propagation of Eggplant Plants

Related to tomatoes, peppers and potatoes, eggplant is a member of the family, thought to have originated from India. It it takes a lengthy growing period as well as heat, which could allow it to be tricky to grow in cooler climates. However, it’s easy to propagate under the best conditions.

Saving Seed

Eggplant seed that is saving isn’t hard. In the event the plant is via your own backyard, it is possible to typically abandon the eggplant on the vine till it’s hard as well as the skin that is exterior seems off- boring or coloured, or it might have a spoiled -soft-feel. Before it’s cut in half the eggplant is cleaned and dried to eliminate any germs as well as the seeds scooped out using a spoon and pulsed to to split up the seeds in the flesh. The seeds are cleaned in strainer or a colander to eliminate any eggplant flesh. They can be placed in one layer on a paper towel or coffee filter for 2 to 3 times, to dry. Seeds are saved in a envelope in a cool, dry location for around four years once dried.

Germinating

Seeds need a temperature of 60 to 95 degrees to germinate, preferring 80 to 90-degrees. Typically, they can be started indoors six months before the last frost date for the region. Alternatively, it’s possible to begin them in empty milk jugs put outside throughout the winter, utilizing a method called “winter sowing,” which turns plastic containers in to mini-greenhouses. Quality top-soil or soil combined with with organic matter, like sawdust or compost, is employed with either germination technique. The s Oil is watered before gently pushing it down to the soil and putting the seed in the container. The grime is stored moist, but maybe not extremely saturated, to prevent rotting the seeds. At 85 levels, it requires 7 to 10 times for seedlings to arise. In the milk jugs, before seedlings arise, the seeds will freeze and after that thaw. This method might take weeks lengthier, centered on-the-air temperature outside the milk jugs, but heat is captured by the plastic and raises the the interior temperature of the container to maintain the seedlings.

Planting

Before they’re placed there completely the seedlings are hardened off preceding to planting, exposing the crops to the out-door atmosphere a tiny mo-Re each day. For cold temperatures-sown seeds were only available in in containers out doors, this is currently finished. In springs or cooler climates, s Oil is warmed by placing black-plastic over it for weeks before planting. Eggplants do nicely in containers. About an hour the eggplant seedlings are completely watered and authorized to drain, then transplanted to a region of shade in well-drained soil. While eggplants can increase in an assortment of s Oil sorts, the plant prefers s Oil which is slightly acidic — a pH of 6.0 to 7.0 is most useful — and abundant in-organic issue, such as compost. It’s most readily useful to plant the seedlings and supply shade for a number of days to avoid burning the plants that are new. Shielding the seedlings is suggested.

Growth Needs

Eggplants require up to 36-inches between rows and 18 to 24-inches between plants. One eggplant per pot is suggested, including basil, stuffed in round the eggplant, with crops. Mulching around each plant regulates the s Oil temperature and conserves water. Compost can assist fulfill specifications that are nutrient. Eggplants do properly in s Oil that’s well-watered but perhaps not saturated, to prevent rotting the roots. Staking gives help for for the fruits that are hefty as they create.

See related

Types of Winter Blooming Yearly Plants

By planting crops that bloom in the seasons, keep the design of spring in your winter garden. Most flowering plants prefer hotter climate, however there are winter-loving bloomers to select from. As most die in time for one to plant your preferred bouquet of spring flowers annual crops are a best choice for the winter backyard.

Annuals

Several kinds of flowering plants are hardy enough to bloom through the winter. Many can not endure the summer heat but prosper in winter climates. These annuals contain their near cousins as well as pansies violas and Johnny jump-ups. These are winter favorites due to the multitude of colours that are available as well as the simplicity of treatment. Sweet alyssum is a fast growing annual that can bloom all year in U.S. Department of Agriculture plant-hardiness zones 7 through 11. They’ve clusters of blooms in pink, white or lavender that deliver a fragrance that is sweet throughout your garden. Several types of sweetpea bloom and prosper 8 through 10, including Cold Temperatures Beauty types and the First Flowering. Plant them in fall to see blooms before Xmas. Sweetpea and alyssum are best utilized as groundcover or in hanging baskets.

Tender Perennials

Although perennials, plant types that are several develop effectively only 12 months in a period. Before the weather turns warm these tender perennials serve bringing their vibrant colours and fragrances. Petunias and dianthus perform properly in the fall and through the winter. Add remarkable peak to your own garden with stock and snapdragons, each of which come in a number of colors to improve your yard landscape. For the greatest outcomes, plant snapdragons in USDA zone 10.

Indoor Bloomers

Flowers do not have to be outdoors. It’s possible for you to brighten your sunroom or living area with several type-S of annuals or tender perennials. While flowers like impatiens and geraniums a-DD spectacular colour to your own floor or counter-top containers browallia and begonias function best-in a hanging basket.

Other Crops

Intersperse some non-flowering crops among your winter flowers if including colour is the goal. The internal leaves flip a vibrant pink, although flowering cabbage and kale crops have the green leaves on the edges. The outcome appears just like a a huge pink flower in your backyard through the winter. As they tend to be bitter, these kinds aren’t generally employed for ingesting. Red large mustard plants a DD depth to your own garden making use of their maroon leaves that are deep. These leaves are edible a-T every phase, even though they get more spicy as they mature. The Swiss variety Vibrant Lights h-AS colourful although leaves stems. Called rainbow chard, the crops have colorful stems that contain red, orange, yellow and pink. Select it to a-DD to your own dinner table when the chard is mature.

See related

Flowers of the Garden for the Westside

Whether seen from the east-side or the side, all sides of the backyard needs to be filled with with crops that are flourishing. The westside typically receives warmth and full sunlight in the middle to late afternoon sunlight. In areas that usually have foggy or cloudy awesome times, the westside is the greatest aspect for sun-loving veggies and flowers. Home values can be added to by a garden in full bloom.

Tall Flowers Full Sunlight

Zinnias (Zinnia) are the new gardener’s best buddy for sunny places. They are loved by gardeners . Each of the bases are covered by the range of the flower from crops only 6″ high to the ones that reach 48-inches tall. The flower petals are organized throughout the heart in a style that was comparable to daisies, which are a great option. Colors operate the rainbow that there aren’t any zinnias that are blue. The down-side to zinnias is they are susceptible to mildew. Varieties in high-humidity locations. Other tall total-sunlight flowers contain hollyhocks (Alcea rosea), cosmos (Cosmos bipinnatus), hibiscus (Hibiscus coccineus) and the ever-popular sunflower (Helianthus annuus).

Medium

Flowers that grow from 18 to 36-inches really are a great match in lots of gardens. They are quick enough to remain manageable, although tall enough to be viewed from a distance, say from your backyard patio. Calendula (Calendula officinalis), also also known as pot marigold, prefers cooler to hotter climate related to petunias, but wants full sunlight. Plant medium-size flowers in the front of kinds that are tall.

Short

Short flowers candytuft (Iberis umbellata), pinks (Dianthus spp.) and lobelia (Lobelia erinus) remain brief but spread. Use them. Nasturtiums (Tropaeolum majus) do well in bad soil. The whole plant, including seeds, is edible. The flowers have a bite. The plant sends out runners that are long that flower in red, orange and yellow.

Drought Resistant

A place on the westside dries out quicker than in a place to the eastside. Many areas are facing water restrictions as a result of drought conditions. Flowers which don’t need as much water is an answer that is practical. Wildflowers really are an organic option. You’ll find restrictions on if you’re able to take seeds from your wild and when. Other alternatives contain yarrow (Achillea spp.), galliardia (Gaillardia pulchella), coreopsis (Coreopsis grandiflora) and sedum (Sedum telephium).

Shade

Does not suggest it’ll be in full-sun just as the place is on the westside. Fences, partitions or trees may shade that aspect of the garden. Before planting, observe the region to decide what sort of sunshine it receives and precisely how much. Shade where the sunlight is obscured by the leaves of the trees about 50-percent of the time calls for flowers that choose less sunshine. Begonias (Begonia semperflorens), impatiens (Impatiens wallerana) and hostas are perfect choices.

See related

In regards to the Silver Frost Pear Tree

Although most pear trees are developed because of their sweet and juicy fresh fruit, some pear species are grown purely because of their beauty. The decorative Silver Frost pear (Pyrus salicifolia ‘Silver Frost’) is also called the willow leaf pear. This tree’s weeping branches and showy flowers make an appealing landscape plant to this tree. However, disease control and appropriate maintenance are are very important to keep the Silver Frost pear flourishing.

Appearance

The Silver Frost pear grows to about 25-feet tall with weeping branches similar to a willow tree. The 3- to 4 inch long leaves that are slim, silvery are also similar to the leaves of a willow. Buds tinged in the suggestion with pink are produced by this pear. By springtime, the buds open to expose white – pear blossoms. The tree does bear little pear shaped fruits, however they’re to bitter and difficult to eat. Silver Frost pear is deciduous, but the leaves have small curiosity for fall colour.

Location and Uses

The Silver Frost pear tree is useful as an accent tree in gardens and parks in places where it is going to receive full sunlight. This decorative pear also is useful in parking lots and along roadways as it could tolerate pollution. This tree isn’t picky about pH or soil type, but shouldn’t be planted in locations where water drains badly or pools. Silver Frost pear isn’t tolerant of extended freezes in cold temperatures or warm summers and prefers locations.

Care and Upkeep

As far as feeding and watering are involved, the Silver Frost pear needs small weekly servicing. Keep the soil round the tree moist, but never wet. While it’s in bloom, to prevent illness, don’t water the tree. These younger than five years old will gain from an annual feeding using a balanced fertilizer in the spring, although trees need not be fed. In winter, you’ll need to prune the tree to keep its shape. In case you choose, you form and can trim this tree.

Problems

Clean it up to prevent messes or in your garden as the fresh fruit drops in the drop. Like pear trees, Silver Frost pear is vulnerable to fire blight. This microorganisms enters the tree through wounds or the flowers in the bark and is identified by branches that are dying, fluid oozing from flowers and the branches and fresh fruit. To stop the dis-ease, don’t over-water abandon it standing in water or your pear tree, and avoid watering while the tree is in bloom. In case your tree does become afflicted, slice the the branches that are afflicted significantly enough straight back to eliminate every one of the infection. This an average of involves cutting-off the branch the branch that is infected attaches to.

See related

Flat Leaf Parsley Propagation

Curly parsley could be quite on the plate, but if you’re searching for strong taste, attempt flat-leaf parsley. Cooks choose it because it’s easier to chop and dries quicker than curly parsley. When you locate various flat leaf parsley that fits you, it’s normal to want to propagate your own plants. You’ll usually have your preferred selection accessible regardless of fads and developments in the seed business, and you’ll sense a deeper experience of your garden.

Method of Propagation

Parsley is propagated from seeds. A member of the carrot family, it’s a long, tapered taproot which makes it unsuitable for division, and it doesn’t root from cuttings. As soon as you plant it in the backyard, abandon it to develop because disturbing the taproot might destroy the plant where it’s.

Collecting Seeds

Parsley is a biennial herb, meaning it creates the first year, foliage, as well as it flowers and produces seeds the second-year. Pick an open pollinated or heirloom kind as opposed to a hybrid when developing flat-leaf parsley for seeds. This helps to ensure the seeds you gather will develop crops which are like the parent plants. You need to grow only one kind of parsley in the backyard to avoid cross pollination. Expect flowers in springtime the 2nd year. Fasten a paper bag on the umbels to catch the seeds after the flowers fade.

Requirements

Plant flat-leaf parsley in an area with light afternoon shade or full sun. It wants a loamy or sandy, well-drained soil using a neutral or slightly acid pH. Flat leaf parsley is hardy in U.S. Department of Agriculture plant-hardiness zones 5 to 9 and Sun Set Zones A3, 1a to 3b and 4-to 2-4.

Sowing Seeds

In October it is possible to sow in moderate, Western climates, but nevertheless, it’s going to go to seed quicker the subsequent year if planted in late winter or early spring when there’s still a possibility of a frost. Soak the seeds in water for 2 4 hrs before planting. Plant them under 1/4 inch of s Oil, producing certain the seeds are entirely coated because they require darkness to germinate. Keep the s Oil moist by watering when there’s less than an inch of rainfall in a week. When they’re about 2″ tall, thin the crops to 6 to one foot apart. Use 5105 the later. an seedlings are about 4 inches tall and again

See related

The best way to Plant Water-Melons in a Container

Most folks believe container gardening is only for crops or salad greens requiring small area — most certainly not not -hogging water melon. But watermelon crops need space to spread out aboveground; a pot that is big is roomy enough to contain the the roots. Merely offer dampness melons love and the rich soil, and train vines to save room. Melons like a lot and warmth of sunlight, therefore gardeners in cooler climates might require to take additional measures to assist the crops fresh fruit and flourish. By way of example, training the vines -facing wall can can help development possible.

Site Planning

Obtain a big container for the watermelon plant. An old washtub, 5-gallon bucket or similar-sized container will do. Use a drill to make a few in the event the container does not have have holes.

Locate a place, out of strong winds and with easy accessibility to water. Place the container there as the pot is going to be large and hard to go once you have added soil while it is still empty.

Add bricks or several rocks to the underside of the container. They help balance the fat of the plant’s best development as it climbs as well as the fruits produce to maturity.

Prepare help for the vines. Watermelon will not-self-cling; the vines require delicate ties for help and mesh or lattice. Attach wire fencing round the pot, fasten a strong wood trellis into a wall, or educate the vines to climb wires connected into a pole buried in the middle of a really big pot and secured in the top to the pot edges. Whatever give you support pick, make it robust since melons are large as well as the vines are vigorous climbers.

Planting

Start seeds in doors to lengthen the developing season. Bob Thompson of “The Triumph Garden” suggests planting two or three seeds each in peat pots stuffed using a s Oil-less combine. Cover them with 1/2 inch of s Oil and then inserting the pots in a plastic t Ray for simple bottom.

Place the seed pots in a warm spot or on a heating pad set-to 75 levels Fahrenheit and keep the seeds moist till they germinate. Germination typically happens within a week.

After the seedlings obtain their first set of accurate leaves pinch out allbut the plant in every pot.

Transfer the pots to some sunny area or spot them under a growlight established three or two inches over the plants. As the seedlings increase, raise the light but keep up with the proximity to keep the youthful crops from getting leggy.

Transplanting Seedlings

Fill your plumped for big pot having a great compost, amended with coarse builder’s sand. Watermelons choose a s Oil that is abundant, somewhat sandy.

Excavate a hole for every single transplant having a little trowel. Make it big enough to to allow for the plant as well as the pot that is bio degradable. Room is required by melons, s O plant only one in each container that is big for finest outcomes.

Keep plants with normal watering. By inserting a finger to the soil check. When the s Oil dries below the most effective inch, water the crops.

Train the water melon by tying the vines in location with delicate strips of fabric or padded twist-ties, as it grows, to climb the assistance wires or trellis.

Support the water-Melon fruits in parts of or huge mesh bags of discarded panty hose linked with the support frame-work.

See related

Care for Juncus Spiralis

Juncus effusus Spiralis also referred to as Corkscrew Hurry, is a low-maintenance grass-like perennial that grows to a peak of approximately 18-inches, creating stems using a cork-screw- like look. Various common hurry, Corkscrew Rush provides decorative worth that is uncommon to other damp location in the backyard or a pond aspect. The plant is ideal for containers, and is usually clipped for use in flower arrangements.

Sun

Corkscrew hurry includes an extensive variety that is native, and could be cultivated in USDA Hardiness Zones 4 to 9. Though tolerant of a small shade, it’s a sun-loving plant that can produce its greatest development in an area with full sunlight. Corkscrew Rush obviously has a fairly unruly, look that is messy, as well as the plant might become un even and leggier if developed in a shady location.

Soil

An alternative or pond area susceptible to flooding that is regular is perfect because of this plant that is wetlands. Corkscrew Rush thrives. The plant could be cultivated as 4″ in shallow-water as deep, or it can be developed with rocks and pebbles. Corkscrew Rush is a difficult plant that will withstand short periods of drought, if left without water, but nevertheless, it’s going to become brown and ugly.

Maintenance

Corkscrew Rush is seldom bothered by insects or diseases, particularly if developed in circumstances that were appropriate. Most servicing for the plant is aesthetic. If corkscrew rush dies down in the cold temperatures, pulling up and discarding the old stems makes space for new development. The new development will not be harmed by leaving the stems, but nevertheless, it could become.

Warning

Corkscrew Rush h-AS tough, aggres-sive under-ground roots that can help the plant spread, though slow to create. You’ll be able to embed a container in to the mud, leaving several inches of water over the container in case a stand of the plant isn’t wanted. The plant might also be developed out doors in a clay-pot, provided that it’s watered.

See related

The best way to Plant Potatoes Hydroponically

The expression hydroponics now pertains to to any way of growing crops without soil once employed to explain the method of growing plants in water. Hydroponics provides you with the capability to develop vegetables, including potatoes, on a tiny condominium balcony or in a little lawn greenhouse. It enables one to grow them year round in the the heat of your house, provided that the plants are subjected to sunlight during your windows all the day. The approach is useful with potatoes although you will find many methods of gardening. This this method utilizes an inert materials like perlite or pebbles to to aid the root and plant system-while it is developing.

Purchase certified seed potatoes from garden shop or an area seed. These cut parts with a couple of eyes each or might be complete potatoes with eyes. Seed potatoes will carry diseases and are more effective than using potatoes you purchase in a grocery shop, which might happen to be treated to prevent sprouting.

Cut entire seed potatoes into pieces regarding the size of an egg, making sure both have at least two eyes.

Move your bin into a warm place that receives at least six hours of sunlight each day. Drain holes in the plastic bin utilizing a 1/2 inch bit. Create a row of holes on all the extended sides of 2″ over the base of the container and your bin.

Pour your perlite to the container, leaving 2″ of space that is open on top. Perlite is a kind of volcanic rock, generally marketed crushed. Its light-weight and dampness-wicking qualities make it perfect for hydroponics. Perlite can be found by you at most of the garden-supply retailers.

Until it commences draining from your holes pour water to the bin.

Plant the seed parts in the perlite, about 1-inch below the area. Place cut parts reduce-aspect down. Space the items four to to 6 inches aside. Cover sprouts peek-through the perlite, which requires about two months. Remove the protect to water the crops, which you ought to do about every three to four times.

Add fluid fertilizer a-T least once a week sprouts seem. Mix 1 teaspoon of 202020 fertilizer with micro-nutrients gallon of water. in a Until it start-S to dribble out the drain holes pour in the fertilizer answer just as you’d regular water.

See related