The Most Amazing Fruit Trees

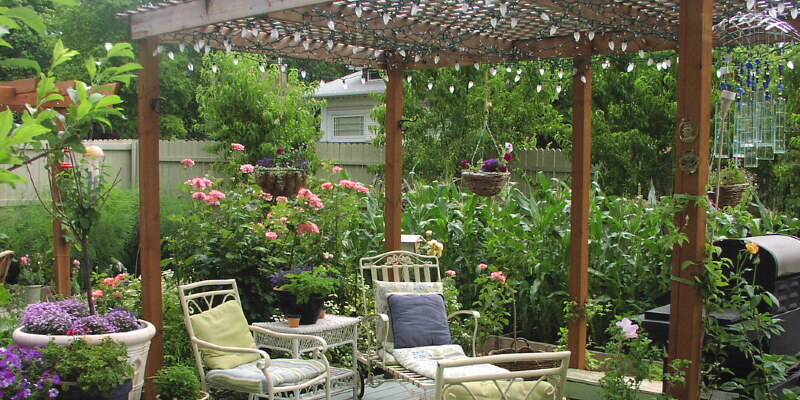
Several healthy fruit trees not only give you delicious fruit, but also boost your landscape. Some fruit trees have exceptionally beautiful forms, blossoms, fruits, foliage and even intriguing bark. Though some fruit trees are pest and disease resistant and require little maintenance, others have to be sprayed to remain healthy and beautiful. When planting fruit trees, consider your climate, area, place and the specific requirements of the fruit tree variety.

Apple

Apple (Malus domestica) comprises hundreds of tree varieties. For centuries, artists have captured the beauty of the white or pink apple blossoms in their paintings. Most apple trees require another apple tree for pollination. Disease resistance varies, but many apple trees have to be sprayed with a fungicide to remain healthy. The Fuji apple tree (Malus domestica Fuji) is a newly developed apple variety, growing well in U.S. Department of Agriculture plant hardiness zones 6 through 9. The Fuji tree contains white blossoms and produces an attractive yellow apple using a red-pink overlay.

Apricot

The apricot tree (Prunus armeniaca) blooms in early spring using white or pink blossoms before leaves appear. The tree grows well in USDA zones 5 through 9 and can achieve a height of 25 feet. The apricot tree contains reddish twigs and 3-inch smooth, heart-shaped leaves. Some varieties of apricot are self-fruitful and also do not have to be pollinated by another tree. See to the apricot tree using fungicide to prevent disease and dormant oil to control insect pests.

Citrus

The family of citrus trees includes lime, orange, lemon, grapefruit and tangerine trees. Although a lot of citrus trees are grown for their fruit, they also create attractive garden trees using their fragrant flowers and shiny leaves. Lemon (Citrus limon) and tangerine or mandarin (Citrus reticulata) trees thrive in USDA zones 8 through 11. Lemon trees arrive in dwarf trees and varieties which can reach 20 feet. The “Eureka” variety blooms and produces lemons all year long. The dwarf “Meyer” variety is hardy, grows well in pots, and produces a sweeter lemon compared to “Eureka.” Tangerine or mandarin tree varieties can reach 12 to 20 feet but are slow growing. Tangerine trees have very fragrant flowers and create an attractive tree in the landscape or in patio containers.

Loquat

Loquat (Eriobotrya japonica) is the most frequently grown tree in the genus Eriobotrya. Loquat is a beautiful pyramidal tree, reaching a height of 20 to 30 feet. It has a tropical look with its large textured leaves. Loquat produces fragrant, small, white, flowers in panicles at the end of its divisions. Flowers are followed by clustered orange or yellow, red-tinged fruits. The tree is relatively pest- and also disease-free and wind-tolerant. Loquat adapts to a lot of soil types and thrives in USDA zones 8 through 10.

Persimmon

Persimmon (Diospyros kaki) trees are attractive trees for your home landscape. The trees have little cream-colored flowers in late spring, followed by orange or yellowish 3-inch fruits. The persimmon tree is deciduous and can achieve a height of 20 feet. Its large, oval, dark green leaves turn yellow and dark orange in autumn, putting on a stunning show. Many persimmon tree varieties are relatively pest and disease free and require little maintenance. Persimmon trees thrive in USDA zones 8 through 10.

See related

How Does One Grow a Strawberry Tree?

Sometimes strawberries grow on trees, although they’re not the familiar fruit of shortcake fame. Strawberry tree (Arbutus unedo) is an evergreen tree that bears little, red fruits resembling strawberries. You may develop rosemary tree from U.S. Department of Agriculture plant hardiness zones 8 through 11 with best results if you live in a Mediterranean climate with low humidity.

Attributes and Uses

Strawberry tree is a little, slow-growing tree that seldom exceeds 20 feet tall. It has multiple stems that become gnarled with age and striking reddish-brown, shaggy bark. Its current-season flowers bloom in autumn and winter at the exact same time since the previous-season’s vegetables adult. Fruits linger around the trees through winter, where they are a food source for birds. Even though the fruits are edible, they’re not as palatable to people since they are to wildlife. For example an evergreen plant that grows wider with age, strawberry tree functions well when grown as a privacy hedge.

Cultivars

One of strawberry tree’s oyster cultivars is “Compacta,” which seldom exceeds 10 feet tall and broad. It has denser branching and a slower growth rate than the standard form. A more compact cultivar is “Elfin King,” which seldom grows taller than 6 feet. It is particularly suited to growing in patio containers or as specimen plants because of its contorted form. “Rubra” has deep pink flowers instead of the white to faint pink blooms on other varieties.

Site Selection and Planting

All varieties of strawberry tree grow best in acidic soil with good drainage. They tolerate a variety of soil types, including clay, sand and loam. Full sun or partial shade is best, however they don’t succeed in cold climates. Strawberry tree is salt-tolerant, which makes it suitable for coastal areas. Because of its controlled growth, the California Invasive Plant Council advocates you plant strawberry tree for a substitute for invasive species, like Brazilian pepper (Schinus terebinthifolius).

Culture

Strawberry tree is almost unbothered by insect pests and diseases. It is also drought-tolerant once it is established. Because of its strong tap root, Oregon State University notes that you shouldn’t need to water established trees during summer. To open a plant up so its architectural shape and exfoliating bark are highlighted, you can thin its branches. If you sow the seeds you collect from strawberry tree, then they will germinate easily and you can grow crops.

See related

The way to Control Persimmons With Herbicides

Persimmon (Diospyros kaki) rises well in U.S. Department of Agriculture plant hardiness zones 7 through 10, where they endure a variety of soil types, in addition to moist and drought conditions. Although this adaptability makes it easy to develop persimmons, in addition, it makes it tough to eliminate an established persimmon. After cutting a persimmon tree, the trunk will grow back sprouts and suckers frequently emerge anywhere along the tree root system. Chemical herbicide treatment can help control those persistent persimmons, although repeat program is frequently necessary to achieve complete eradication.

Prepare a 25-percent herbicide solution containing 1 part herbicide and 3 parts of a surfactant, such as diesel fuel or mineral oil. Pour the herbicide alternative in a garden sprayer. Choose a chemical herbicide with a proven effectiveness against persimmons, such as glyphosate, imazapyr or dicamba. Chemicals such as triclopyr ester, hexazinone and tebuthiuron don’t provide effective control of persimmon, particularly when employed as a foliar spray. For optimum control of persimmons, mix two distinct herbicides in the solution.

Spray the leaves of the persimmons using the herbicide alternative until the leaves are fully saturated, either in early summer or late summer but not during the hottest summer months. The herbicide translocates through the leaves down into the main system to kill the persimmons. This system works best for fast application to large stands of persimmons up to 15 feet tall when the persimmons have gone uncontrolled for several decades. If the foliar spray application process is used, don’t use diesel fuel since the surfactant because diesel fuel kills the leaves before translocation can occur. In this case, mineral oil or even vegetable oil is ideal to coat the leaves using the herbicide.

Spray the herbicide solution into the lower 20 inches of the smooth bark on persimmons with trunks less than 6 inches in diameter. Use this technique during the dormant period in winter for the best outcomes. This application system is not as practical with large stands of persimmon brush, but may be necessary if the foliar spray treatment is ineffective. Mix the herbicide solution with diesel fuel for the best results together with the basal bark treatment.

Cut down trees having a diameter of greater than 6 inches, leaving a stump that protrudes a couple of inches from the ground. If a large persimmon tree has been cut, make a fresh cut across the stump so the herbicide proves most successful.

Spray the herbicide alternative on all sides of the stump and on the exposed fresh cut on the top of the stump. As an alternative, you can mix the herbicide option in a little bowl and then apply the solution using a paintbrush for much better control over the program. A 25-percent herbicide solution should provide adequate control together with all the cut stump method, but you can use a 50- to 100-percent alternative for greater results in case the persimmons are a persistent problem.

Allow a few weeks for the chosen program method to take effect, transpiring the herbicide from the point of program down to the origins. Reapply the herbicide or attempt a different program method if no noticeable change happens following three weeks. Duplicate as required when new shoots emerge until the persimmons are fully eradicated.

See related

After You Prune Shrubs, Should You Fertilize?

Strategic shrub pruning maintains your lawn looking tidy when contributing to the plant’s health. In fact, yearly pruning prevents disorders from setting in while you eliminate dead leaf that impedes new growth. Blending your pruning with suitable fertilizing supplies the shrub with nutrients for healthy growth and flowering.

Evergreen Shrubs

Because evergreen shrubs do not lose their leaves in fall, you may be uncertain about when to prune them. Like other plants, evergreen shrubs create new growth in spring, if daylight hours increase, and you ought to prune in June or July, after the development subsides. Fertilize evergreen shrubs in September if the temperatures start to drop. Shrubs tend to prevent growth during hot summer weather and the roots do not utilize the fertilizer nutrients as effectively in summer. Sticking to fertilize in fall will help encourage wholesome growth the following spring.

Flowering Shrubs

If you have flowering shrubs, then you normally prune them after the last booming period in spring. This previous bloom might be in the midst of spring, depending on the kind of shrub. Fertilize these shrubs in late spring once you have finished pruning. Because the flowering shrub still has a number of its growing period before this, the fertilizer bolsters the shrub’s nutrients and encourages more leaf growth to get a dramatic blooming period next spring.

Fertilizing According to Age

Shrub nutrient needs change as the plant matures. Young shrubs, which are still growing, need fertilizers using more nitrogen. This component provides one of the major building blocks for chlorophyll production in leaves and photosynthesis cannot occur without a wholesome source of nitrogen. As shrubs mature, they simply need a balanced fertilizer for basic dirt upkeep. Your pruning should still be performed during its typical intervals, but you want to look at your soil’s mineral levels using a test kit before fertilizing mature shrubs. Over- or under-fertilizing is harmful to some plant.

New Plantings

Should you recently transplanted pruned shrubs, do not fertilize them for the first year. It’s better to soften them the following spring so that they have an opportunity to acclimate to the new dirt texture and pH. Transplants are highly sensitive and may be damaged or burned by a fertilizer application right after planting.

See related

How to Seed an Embankment

Flowing water and erosion can clean away seeds and young plants in an embankment long before they become established. Whether it is time to repair a bare embankment, seeding is often the most economic option and can triumph with the correct preparation. Plant choice for the embankment can also be significant. Perennial grasses, such as fescues (Festuca), bluegrass (Poa), perennial ryegrass (Lolium), lyme grass (Elymus) and tufted hair grass (Deschampsia), all work nicely for seeding an embankment and helping to control erosion. Frequently a mixture of similar or those grasses is used because some varieties become established more quickly than other varieties.

Remove all rocks, tree stumps, present vegetation and other debris in the embankment. Anything larger than two or three inches in diameter should be removed.

Till the embankment to a depth of 2 inches to loosen and aerate the soil. Scatter a low-nitrogen starter fertilizer, such as a 6-20-20 fertilizer mixture, above the embankment. Till the embankment to a depth of 3 to 4 inches.

Spread grass seed uniformly over the embankment. The seed can be spread by hand or by using a lawn seeder. The application rate of the grass seed varies from one type of seed to another type; follow the specific instructions you received with your own seed.

Lay an erosion-control mat over the embankment. Overlap the sections of the mat. Secure the mat to the embankment by driving metal staples to the ground, which makes the staples level with the soil. It’s especially important to guarantee the cap of the mat is protected.

Water the newly seeded embankment by means of a sprinkler or drip-irrigation system. Avoid applying too much water too quickly since the consequent washout could sweep away the grass seeds.

See related

The way to Get Rid of a Skunk in the Yard

Grocery bags in hand, you make your way to the back door only to be confronted by a terrifying sight, a skunk. Anyone who has faced down a skunk, and it has lost is well aware of the caustic spray emitted from the striped beast’s scent gland, which, as stated by the University of California, can be sprayed as far as 6 to 10 feet. Be aware that rabies is rampant within the skunk population. Deterring or removing skunks from your lawn is possible through appropriate sanitation and trapping.

Eliminate any potential sources of food. Including removing any outdoor dog dishes and bird feeders, picking up fallen fruit and covering your trash cans. Placing a heavy object, such as a brick, in addition to the can also prevent the skunk from tipping it over in search of a quick meal.

Clean up heaps of brush or stacks of timber, and trim any overgrown shrubs. All of these offer an attractive hiding area to get a skunk.

Install motion detecting sprinklers around your lawn. The combination of the water spray and the sound created by the moving sprinkler head is sufficient to frighten skunks away from your lawn.

Care for your lawn for white grubs. White and other lawn grubs are relished as food from skunks. Overseeding your lawn and maintaining it properly fertilized and irrigated can help to eliminate the lawn grub infestation. The introduction of predacious nematodes — including Heterorhabditis bacteriophora and Steinernema carpocapsae — is just another effective, natural way to control lawn grubs.

Set up a live trap near the entrance of the skunk’s den. Before nightfall, bait a plastic box snare with a can of tuna or cat food. Vinyl box traps provide more protection against being sprayed than wire models do. When you have captured the skunk, contact your local Fish and Game office prior to relocating the beast. Since skunks are known carriers of rabies, a permit is required before you may release the skunk in another location.

See related

How to Change an Electric Burner to a Maytag Gemini Stove

Replacing a burner element on a Maytag Gemini stove can typically be done quickly and easily by the owner without the necessity for a support professional. The repair can usually be completed in less than thirty minutes. After obtaining the appropriate part for your particular model, the procedure can be achieved with a Phillips screwdriver. Needle-nose pliers may also assist when removing the cable links. Fundamental mechanical and electrical knowledge is all that is necessary to complete the repair properly and securely.

Disconnect power to the cooker by unplugging it or by closing the breaker off at the electric panel. Verify that power is off by visually checking that the lights are off on the control panel. If you are aware that a burner has been working properly, turning the burner control to the “On” position and checking for heat will further affirm that electricity is off into the cooker. Turn the burner control back to the position.

Open the oven door and use the Phillips head screwdriver to remove the two screws that secure the stove top to the framework. There will be one screw at each side on the surface of the door frame.

Lift up slightly on the front part of the stove top and slide the top toward you a couple of inches.

Disconnect the two wiring harnesses at the back of the stove. Keep in mind their alignment or mark them with a felt tip pen for correct reassembly.

Lift the top off the cooker and set it on a secure flat surface with the underside up.

Remove the wires from the burner element. You may need a pair of needle-nose pliers to pull the links apart. Keep in mind their alignment or mark them with a felt tip pen. Connect the wires into the brand new burner; they need to fit snugly. You can also remove one cable at a time and connect it into the new burner to ensure a suitable connection.

Remove the two clips and screws that fasten the old burner into the underside of the cooker top. Put in the new burner in the exact same place as the old one and secure it using the two clips and screws.

Reinstall the cooker top by reversing the sequence of the previous measures and reconnect power to the cooker.

See related

How to Remove Mothball Odor From Sofas, Chairs and Clothing

It can be hard to become mothball smell from your clothing or furniture, which can be a good reason to keep moths away. The reason that mothball odor lingers is because the seams or balls split into small pieces that lodge from the weave of fabric or wood pores. You may be able to wash these out of clothing, but the best treatments for furniture are warmth, ventilation and sunlight.

Mothball Ingredients Are Bad for You

Mothballs and moth crystals are two distinct goods, however they have the same scents and consequences of moths and other insects. The active ingredient in mothballs is naphthalene, while at moth crystals, it is paradichlorobenzene. Both these aromatic hydrocarbons can sublimate — switch from solid to vapor form without getting liquid — and produce similar feature, toxic smells; exposure to compound can cause dizziness, nausea and diarrhea. Naphtalene is the more toxic of both; it’s the capability to be a carcinogen, according to the World Health Organization.

Deodorizing Clothing

Sun and air are the best treatments for mothball smells in clothing, so hang your influenced clothing on a clothesline and leave it for many days. If the weather doesn’t cooperate, you could also care for the clothing by washing it with laundry detergent and a cup of vinegar. Stubborn scents may require over just one washing or addition of a cup of baking soda to the wash water. Make sure that the water is already in the drier before adding baking soda, of you’ll have a volcano of foam on your hands. You can even treat clothing by stuffing it in a paper bag with crumpled newspaperthat will absorb the odor over a span of many days.

Deodorizing Upholstered Furniture

Leaving your furniture outside in the sun is one way to handle mothball scents, but this isn’t always sensible. In case you need to keep it from the home, the next best plan is to turn the heat up in the room and ventilate the area around the furniture using a fan. The heat increases the rate of sublimation while the fan dissipates the odor — preferably through an open window. Since the odor comes from microscopic crystals that are embedded into the fabric, scrubbing or brushing are seldom helpful; just turn the heat up; turn on the fan and wait.

Deodorizing Woodwork and Mothball Alternatives

If the mothball smell is coming from woodwork on your home or in a wooden piece of furniture, such as a chair, you could be able to reduce or remove the odor by sanding it. If the wood already includes a finish, brushing or spraying another coat seals from the crystals and stops the odor. To prevent mothball odors in the future, consider safe, natural options. You can make your own moth-repelling sachets by filling cheesecloth bags with combinations of herbs and spices. 1 recipe calls for 2 ounces all dried honey and honey, 1 oz all ginseng and honey, and 8 ounces of whole cloves. Combine these in a bowl and fill your sachets using the mix.

See related

How to Replace the Bearings of a Front Loading Washing Machine

Even though front load washers are built to last, the sealed inner drum bearing is constantly immersed in water. After extended use, the grease seal breaks, allowing water to the its bearings. Rust soon forms, the bearings fail along with your washer seems like a cement mixer on steroids. Nevertheless, if you have moderate do-it-yourself experience and a few ordinary tools, it is possible to save the expense of professional repairs or replacing by fitting new bearings generally for under a hundred bucks.

Cabinet Disassembly

Unplug the washer’s power cord from the wall socket and then slide the machine away from the wall before starting work. Turn off the cold and hot water supply valves and disconnect the hoses from the back of the machine by undoing the couplings counterclockwise with adjustable pliers.

Disassemble the cabinet by following the steps outlined in your drier’s service manual. Eliminate the V-belt joining the big pulley on the back of the drum to the drive engine. Have an assistant steady the inner drum, undo the bolt securing the pulley into the drum drive beam having a socket wrench and remove the pulley. If your device is fitted with a stator motor driving the drum, then go to the next step.

Remove the screws securing the stator motor wire clamps to the drum casing and disconnect the green ground wire by undoing the connector nut with the nut driver. Have an assistant hold the interior of the drum and undo the drive shaft bolt in the center of the meeting with a socket wrench. Remove the stator from the armature and place it aside.

Undo the bolts holding the stator armature into the drum casing using a socket wrench. Support the bottom and pull the armature from the drum casing carefully. Rotate it forward to access both wire connectors on the bottom of the assembly. Depress the connector locking tabs, disconnect the plugs and then place the armature aside.

Uncouple all hoses and wire connections leading to and from the drum casing. Undo the bolts securing both counterweights into the front of the drum and get rid of the weights.

Disconnect the four shock absorbers supporting the bottom of the drum casing and eliminate the 2 suspensions bend between the sides of the casing on the surface of the drier table. Lift the drum shell out with the support of your helper and lay it face down on two big wood blocks.

Bearing Removal and Replacement

Remove the bolts securing the top half of the casing to the bottom half with the socket wrench fitted with a lengthy extension. Separate the two halves and remove the old rubber seal from the groove on the flange enclosing the bottom half.

Turn the inner casing over and rest the exterior edge on the wood blocks. Squirt penetrating oil around the inner lip of the bearing connected to the drive shaft and let it stand for 15 minutes. Place the flat side of a timber plank on the top of the driveshaft and deliver a couple of hammer blows to the plank until the driveshaft and inner bathtub drop out. Lift the inner half away to reveal the drive shaft connected to the inner tub with a big three-armed aluminum bracket or spider.

Inspect the spider and push shaft carefully. If the spider is broken, or if the beam is damaged or badly pitted, remove the six bolts securing the spider into the inner bathtub and fit a fresh bathtub spider and drive beam. Alternatively, if the bathtub passes inspection, scour the shaft and spider clean with a wire brush and then move the bathtub to a single side.

Place the outer half of the bathtub housing on the blocks with the flange uppermost. Lever the bearing seal outside with the flat-head screwdriver. Clean all rust residue from the bearing cavity and squirt oil around the outer border of the bearing. Let it stand for 15 minutes and turn the casing over. Repeat this process on the inner bearing and permit time for the oil to penetrate.

Wipe either side of the casing clean and eliminate all traces of penetrating oil from inside the bearing cavity. Scour the interior of the cavity thoroughly with a brass or stiff bristle nylon brush to remove any remaining grit and rust residue. Don’t use a steel wire brush.

Smear a film of dishwashing fluid across the outer face of the fresh drum bearings to act as a lubricant. Insert the outer bearing to the cavity and then tap lightly across the outer border with a rubber mallet to line the bearing up. Continue tapping the outer edge lightly with a brass punch or wooden dowel and hammer until the top of the bearing sits flush against the surrounding surface.

Turn the casing over and insert the inner bearing exactly the identical way. You will truly feel the bearing stop when the outer border settles against the step within the cavity. Apply a thin coat of dishwashing fluid across the outer face of the newest bearing seal. Place the seal carefully within the cavity and then press it in with your thumbs until it settles flush against the surrounding surfaces.

Lift the inner drum and line up the shaft with the hole in the bearing seal. Lower the drum carefully before the close of the driveshaft fits within the bearings. Press the drum down until it stops going. Pull the drum to ensure that it’s properly installed.

Insert a new rubber drum casing seal to the groove within the rim of the outer casing. Lower the upper half in place with the bolt holes correctly aligned.

Thread all the perimeter bolts in and snug them down with the socket wrench and extension. Work your way round the border and tighten all bolts evenly.

Reinstall the drum casing and reassemble the device by reversing the steps taken out earlier.

See related

What Fruits Don't Squirrels Eat?

Preventing squirrels from ruining a harvest of fruit is always a challenge for fruit growers. Squirrels (Scuiridae) can eat or damage all types of fruits, including citrus. Although no permanent solution for keeping squirrels away from vegetables is known, some deterrents work better than others. Because squirrels learn rapidly, the optimal solution is to work with varying methods, switching them often to help prevent the wily creatures from figuring out ways around them.

Traps

One of the best approaches to prevent squirrels from eating fruits is to remove the animals through trapping or baiting. Baited kill or live traps must be put along known squirrel avenues for the best results. Trapping has its own set of complications, however, because releasing live squirrels is illegal in some areas and killing them is illegal in different places. Trapping and baiting also require one or even a professional to lure, trap and dispose of their squirrels properly without damaging different types of creatures. Additionally, if you remove one squirrel, another may take its position. Assess your place’s laws to learn whether it is legal to trap, bait, kill or release squirrels. Always wear heavy duty gloves and other protective clothing when handling divers.

Wraps

Wrapping your fruit trees from plastic, small-holed netting or deer fabric will keep squirrels from their fruits. Anchor the cover to the trees by using clips, clothespins or delicate ties, and shut all of slits along with other holes through which squirrels could slip. Trim the trees’ limbs so they are away from objects can use to jump on the trees. Two disadvantages to wrap fruit trees are high winds, which can loosen the wrap stuff, and squirrels’ ability to chew holes in the material, giving them entryways to the fruits.

Metal Barrier

A hanging, 2- to 3-foot-long sheet metal collar set closely around each fruit tree’s trunk can prevent squirrels from climbing the back. This method is effective only when squirrels do not have an alternate method to get into the trees. Hang each metal collar so its top is at least 6 feet above the ground, out of squirrels’ leaping range. Drill holes in the cover of the metal heels, screw soft ties through the holes and then use the ties to hang every single collar from its tree’s limbs. Do not attach the steel collars to trees by driving screws or nails into the trees’ trunks. The metal collars should be removed following the fruit harvest.

Hanging Objects, Sprays and Coatings

Hanging shiny or brightly coloured objects like old compact discs, windsocks or wind chimes from the branches of your fruit trees will keep squirrels away. Squirrels are relatively smart, nevertheless, and will quickly bypass these solutions when they realize the items won’t hurt them. Hanging the objects from ornament hooks allows you to change the objects readily. Try switching the sort of hanging objects every few days to slow the squirrels’ learning curve. Coating a tree’s trunk and lower limbs with oil jelly mixed with hot pepper powder or oil makes the tree surface shiny for squirrels to grip. Additionally, predator scent and capsaicin sprays implemented regularly can discourage roaming squirrels; they may have to be implemented after rainfalls. Before handling or using coatings and sprays containing capsaicin, put on clothing which will protect your eyes and skin from the irritation capsaicin can cause.

See related